How to Plan a Curbless Shower for a San Diego Bathroom Remodel
A curbless shower can make a bathroom feel larger, cleaner, and easier to enter. The finished design looks simple, but the construction underneath is precise. Floor elevation, slope, drain placement, waterproofing, glass, and the surrounding room all need to be planned together.
What Makes a Shower Curbless?
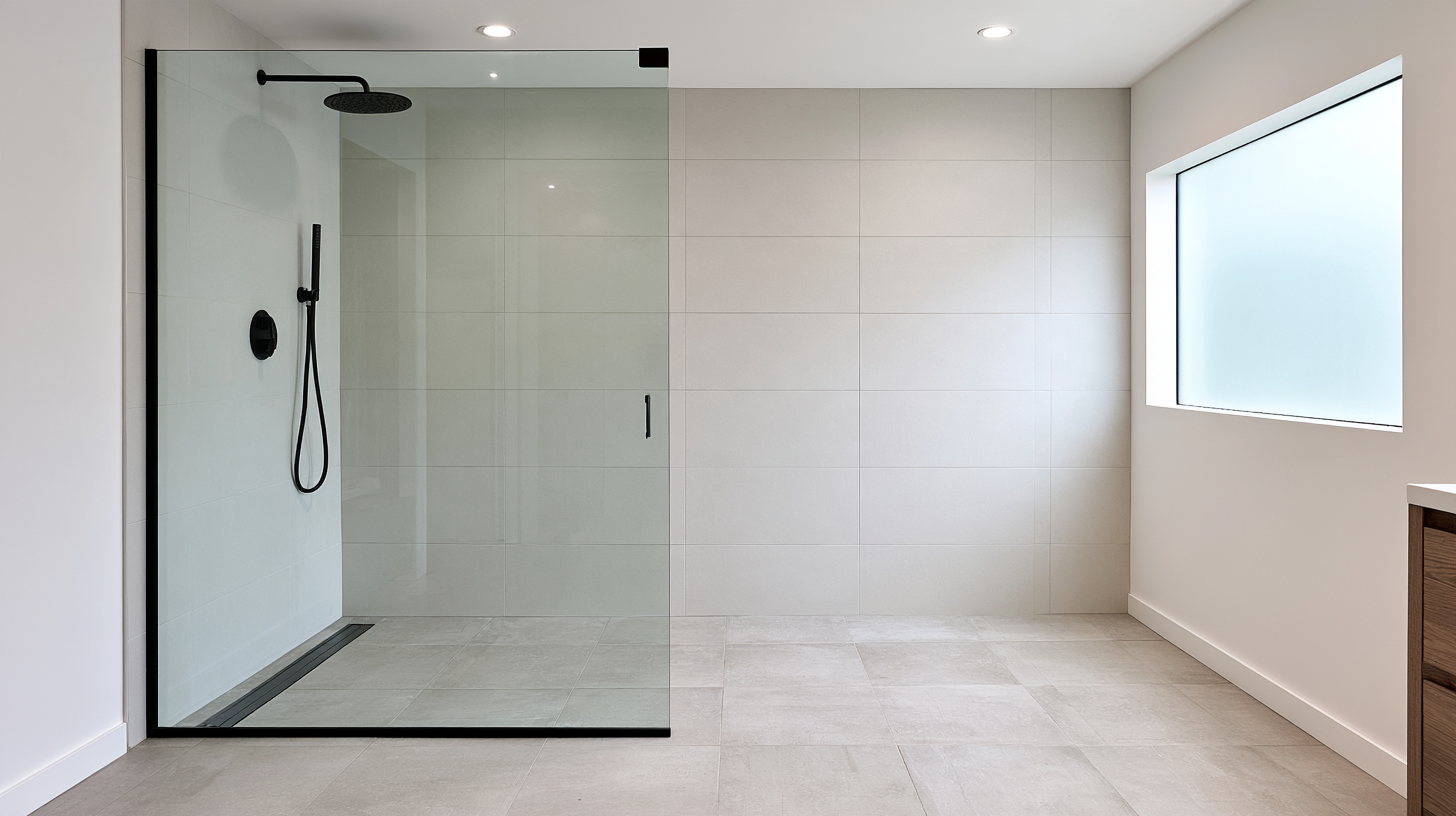
A curbless shower removes the raised threshold that normally separates the shower floor from the bathroom. Instead, the shower area is recessed or built so water flows toward the drain while the entrance stays level or nearly level.
This can support a modern open look and more comfortable access, but it leaves less room for construction errors.
Start With the Existing Floor Structure
Creating slope without raising the entire bathroom may require changes to the subfloor or framing. The available depth depends on whether the bathroom sits over a slab, crawlspace, or framed floor. Structural conditions should be evaluated before tile selections lock in the design.
Waterproof Beyond the Shower Entrance
Without a curb, water is not contained by a physical barrier. Waterproofing may need to extend beyond the visible shower footprint, with seams, corners, wall transitions, and penetrations treated as one connected system.
Silver Strand’s Bathroom Remodeling service includes custom showers, tile, plumbing, fixtures, lighting, and waterproofing coordinated under one project lead.
Plan the Slope and Drain Together
The floor must direct water toward the drain without creating an uncomfortable walking surface. A linear drain can support a single-direction slope and large-format tile in some designs. A centered drain usually requires the floor to slope from several directions and often works better with smaller tile.
- Shower size and spray direction
- Drain location and plumbing access
- Tile size and layout
- Entry position and bathroom circulation
- Glass panel or door placement
Control Splash and Overspray
A curbless opening does not have to mean an entirely open shower. Fixed glass, a carefully placed showerhead, adequate depth, and a planned drying zone can keep water where it belongs. The bathroom layout should also protect vanities, doors, outlets, and frequently used storage.
Include Ventilation and Comfort
Good exhaust ventilation helps manage humidity and supports the longevity of finishes. Heated floors, benches, handheld showerheads, niches, and layered lighting can improve comfort, but each feature affects wiring, plumbing, waterproofing, or framing and should be selected before rough work begins.
Think About Long-Term Use
A no-threshold entrance can be helpful for aging in place, temporary injuries, or general convenience. If accessibility is a goal, evaluate the whole route—not only the shower entrance. Door width, floor transitions, clearances, controls, seating, and storage all influence usability.
Build the Details Before Setting Tile
A successful curbless shower depends on planning that happens before the finish work. Silver Strand Construction coordinates demolition, structural preparation, plumbing, electrical work, waterproofing, tile, glass, fixtures, and inspections where required.
Get a Free Estimate to discuss whether a curbless layout fits your bathroom’s structure and daily use.
Frequently Asked Questions
Can every bathroom have a curbless shower?
Not always without modifications. Floor structure, drain location, available depth, room size, and surrounding elevations determine what is practical.
Do curbless showers leak more easily?
They should not when the slope, drain, waterproofing, glass, and spray pattern are properly designed and installed. Poor execution creates risk in any shower.
Can large-format tile be used on the shower floor?
Sometimes, particularly with a suitable linear-drain design. The required slope and tile layout must work together to avoid uneven edges or poor drainage.